Showing posts with label Teams. Show all posts

Wednesday, March 11, 2020

Bug in UCDialplans North American Rulesets


I was troubleshooting an issue where people couldn't dial US/CA toll-free numbers in Teams the other day, when using Direct Routing. Initially, the root issue wasn't that easy to solve, due to the lack of a Voice Routing Test Case tester like we have in Skype for Business. Normally, one of the first things I do when troubleshooting issues like this, is to make sure the user is actually ALLOWED to make such phone calls, based on their assigned voice policy. Teams doesn't have an equivalent to the SfB voice route tester. If it did, I would have found it much sooner.

The first thing that I did was look at the user's call history in the Teams Admin Centre. Sure enough, every toll-free call made by the user failed with the below error logged in Teams:

"The destination failed because it doesn't exist"


No information about this error came up in a search. Reviewing logs from the SBC showed the call never got to the SBC. Client logs didn't provide any usable information. Finally, I looked deeper into the applied dialplan. At this point, I saw the problem, and it was me.

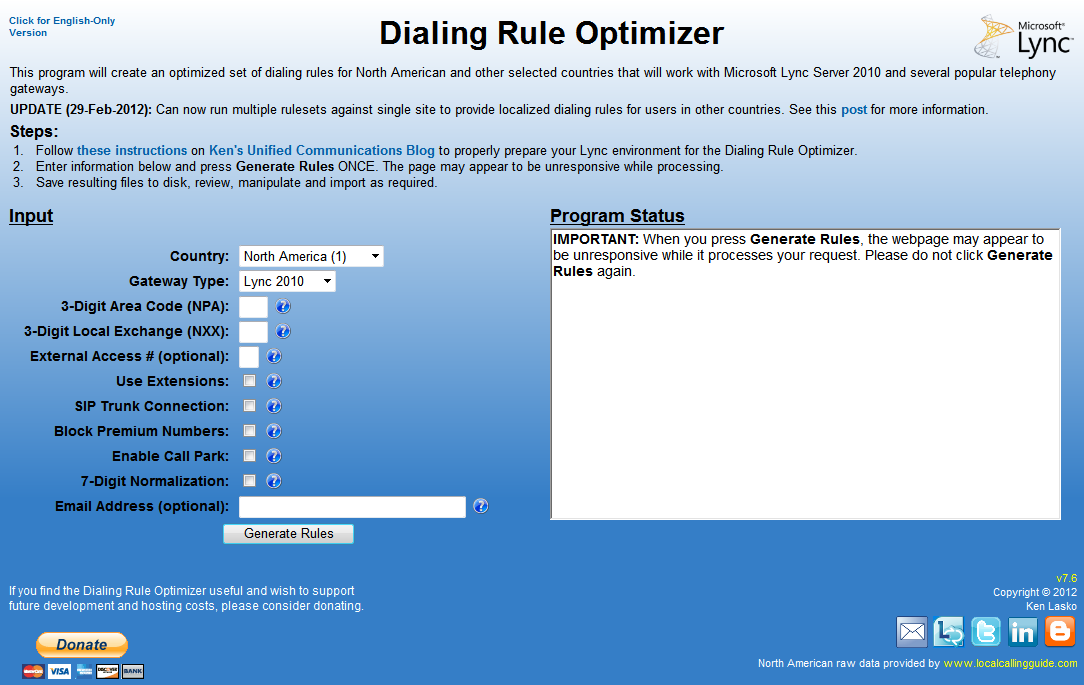
Of course, I had applied a ruleset generated by UCDialplans.com. Everybody was automatically assigned the global voice policy, which was set to allow dialing only within the US. This utilizes a feature in UCDialplans.com where you can decide exactly what constitutes a "National" call.

If you're not familiar with the intricacies of the North American dialplan (NANPA), just know that the US, Canada and 26 Caribbean countries share the country code +1.  Each country has its own set of one or more area codes. There is no way to distinguish whether a number is in the US, Canada or a Caribbean country just by looking at it.

UCDialplans.com can configure your National voice policy so that a "National" call can include any number that starts with +1, limit to US/CA or limit it to US OR CA. When creating the ruleset, UCDialplans.com has a drop-down option where you decide what you want to "Treat as National".


If you select "In-Country Only" (which is the default option), UCDialplans.com will create a national voice route that only includes the area codes for the selected country. The current US example is below, which explicitly details every area code in the US, and is derived programmatically from the current list of area codes:

^\+1(?!(900|976))(20[^04]|21[^1]|22[^1267]|23[149]|24[08]|25[12346]|26[0279]|27[0269]|30[^06]|31[^1]|32[0135]|33[^358]|34[0167]|35[12]|36[014]|38[056]|40[^03]|41[^168]|42[345]|43[0245]|44[0235]|46[39]|47[0589]|48[04]|50[^06]|51[^149]|53[0149]|54[01]|55[19]|56[12347]|57[01345]|58[056]|60[^04]|61[^13]|62[03689]|63[016]|64[016]|65[017]|66[01279]|67[018]|68[0124]|70[^059]|71[^01]|72[04567]|73[1247]|74[037]|75[47]|76[02359]|77[^1678]|78[1567]|80[^079]|81[^19]|83[0128]|84[3578]|85[^1235]|86[02345]|87[028]|90[^025]|91[^1]|92[0589]|93[^235]|94[0179]|95[12469]|97[^4567]|98[0459]|281|458|520|828)[2-9]\d{6}

For the US/Canada option, rather than explicitly including every area code, it EXCLUDES Caribbean area codes, which is a much smaller list. Similarly, for US/Canada/Caribbean there is no need to exclude any area code (except premium), so the list is even smaller.

In an effort to reduce route selection time and processing overhead, the National voice policy doesn't explicitly include PSTN usages for local dialing, UNLESS least-cost routing is being used. For the US/Canada and US/Canada/Caribbean route options, toll-free numbers are captured by the route pattern because they're NOT in the exclusion list of Caribbean area codes. Unfortunately, I didn't account for toll-free numbers in the US or Canada Only route options, which means that toll-free numbers can't be dialed if you use the default options.

You could fix this by adding the Local PSTN usage to your voice policies, but that adds unnecessary overhead. A better option is to explicitly include toll-free numbers in the computed route.

^\+1(?!(900|976))(20[^04]|21[^1]|22[^1267]|23[149]|24[08]|25[12346]|26[0279]|27[0269]|30[^06]|31[^1]|32[0135]|33[^358]|34[0167]|35[12]|36[014]|38[056]|40[^03]|41[^168]|42[345]|43[0245]|44[0235]|46[39]|47[0589]|48[04]|50[^06]|51[^149]|53[0149]|54[01]|55[19]|56[12347]|57[01345]|58[056]|60[^04]|61[^13]|62[03689]|63[016]|64[016]|65[017]|66[01279]|67[018]|68[0124]|70[^059]|71[^01]|72[04567]|73[1247]|74[037]|75[47]|76[02359]|77[^1678]|78[1567]|80[^079]|81[^19]|83[0128]|84[3578]|85[^1235]|86[02345]|87[028]|90[^025]|91[^1]|92[0589]|93[^235]|94[0179]|95[12469]|97[^4567]|98[0459]|281|458|520|828|8(00|33|44|55|66|77|88))[2-9]\d{6}

The latest version of UCDialplans.com does this now, but if you've previously applied a UCDialplans.com ruleset using the "In-Country Only" option, you can either manually update your National voice route, or you can run one of the below scripts, which will seek out any US/CA-National voice route and apply the fix. If you use any of the other options, you aren't affected.

How can I tell which option was used?

Easily. The voice route for either of the other options are MUCH smaller in size. If your voice routes look like this, you are not affected.

US/Canada: (?!(24[26]|26[48]|284|345|441|473|649|664|721|[67]58|767|784|8[024]9|86[89]|876|900|976))[2-9]\d\d[2-9]\d{6}

US/Canada/Caribbean: (?!(900|976))[2-9]\d\d[2-9]\d{6}


The Fix is In

The below PS commands will append tollfree prefixes to the problematic voice route. Run whichever is appropriate for your environment, and BACKUP before you run this.

Skype for Business Fix

$Routes = Get-CsVoiceRoute | Where {($_.Identity -eq 'US-National' -or $_.Identity -eq 'CA-National') -and $_.NumberPattern -notlike '*[2-9]\d\d[2-9]\d{6}' -and $_.NumberPattern -notlike '*8(00|33|44|55|66|77|88)*'}; ForEach ($Route in $Routes) {Set-CsVoiceRoute -Identity $Route.Identity -NumberPattern $Route.NumberPattern.replace(")[2-9]\d{6}","|8(00|33|44|55|66|77|88))[2-9]\d{6}")}

Microsoft Teams Fix

$Routes = Get-CsOnlineVoiceRoute | Where {($_.Identity -eq 'US-National' -or $_.Identity -eq 'CA-National') -and $_.NumberPattern -notlike '*[2-9]\d\d[2-9]\d{6}' -and $_.NumberPattern -notlike '*8(00|33|44|55|66|77|88)*'}; ForEach ($Route in $Routes) {Set-CsOnlineVoiceRoute -Identity $Route.Identity -NumberPattern $Route.NumberPattern.replace(")[2-9]\d{6}","|8(00|33|44|55|66|77|88))[2-9]\d{6}")}


My apologies to anyone caught up by this bug. If you see me in the streets, feel free to slap me.


Monday, March 9, 2020

"Have you tried turning it off and back on again?" for MS Teams

One of the most powerful tools in a support professional's arsenal is the tried-tested-and-true method of restarting a computer to resolve strange issues. I can't tell you how many times this fixed the oddest issues over the years. Why does it work? You might as well ask where socks go once placed in the clothes dryer.

I'm excited/sad to report that the same method works in Microsoft Teams to resolve strange issues that defy explanation. I'm not talking about client-side issues. I'm talking about issues at the Office 365 end of things. How does that work when there are no administrator-accessible servers to restart? You simply toggle the relevant setting off and back on again.

We use Direct Routing for our PSTN services, and for the most part it works great. In the past few weeks, I've had some of our users experience strange issues with telephony in Teams.
  1. A few users were unable to receive any PSTN calls. Troubleshooting at the SBC would show 487 Request Terminated - Phone number not found.
  2. Another user's outbound PSTN calls were showing as Anonymous/Private. There weren't any caller ID policies being applied that would account for the behaviour.
For each of those issues, I verified that things were indeed setup properly in Teams via PowerShell. Get-CsOnlineUser showed that their LineURI and OnpremLineURI settings were correct, and Enterprise Voice was enabled. Get-CsOnlineVoiceUser showed they were all licensed, PSTNConnectivity was OnPremises and their Number was correct.

In short, there was nothing on the Teams side of things that indicated an issue. I decided to try the "Have you turned it off and back on again?" trick, which consisted of:
Set-CsUser -Identity UserID@contoso.com -EnterpriseVoiceEnabled:$FALSE
Set-CsUser -Identity UserID@contoso.com -EnterpriseVoiceEnabled:$TRUE

I waited patiently all of 10 seconds between commands. I then instructed the users to log off and back onto Teams. Lo and behold, in each case, the problem went away.

Yeah, I know. I don't get it either, but whatever...it works.

Monday, February 24, 2020

The Complete Guide to Using UCDialplans.com for Microsoft Teams Direct Routing

Seasoned veterans of my dusty, long-dormant blog will remember I did a comprehensive post (in 2012! EIGHT YEARS AGO!!!!) on how to use the Lync Optimizer to automatically create dialplans for your Lync deployments. That guide is still useful for every on-prem version of Lync and Skype for Business since then.  I did a similar guide for Skype for Business Online in 2017 (a mere 3 years ago). With all the changes that Teams has brought (Direct Routing, and so much more!), I figure its about time I did an updated guide on how to use UCDialplans.com in Direct Routing scenarios.
Who could forget the 2012 Hoff masterpiece Piranha 3DD? I didn't know this existed until just now. I know what I'm watching tonight!

A Milestone

Another reason why I'm doing this now (February 2020) is because for the first time, the monthly total number of S4BOnline/Teams rulesets generated by UCDialplans.com has surpassed the number of S4B On-prem rulesets. This is an unofficial barometer of which platform is more popular for Enterprise Voice deployments. I could go on about how many S4B On-prem deployments are at a mature state and generally don't require many net-new dialplans compared to Teams where many are just starting to move their voice loads to it, but SEMANTICS! Just look at the chart!

Who should use this guide?

If you're on MS Teams and you are using Teams as your phone system, you'll be using it in one of two modes (or both in some cases):

If you're using Teams Direct Routing (using your own SBCs to provide dialtone), then you should definitely use this guide. It makes the entire process of creating voice routing policies, routes, PSTN usages etc. so much easier. If you are already confused by the above terms, then I HIGHLY recommend you use this tool.

If you're using Microsoft Phone System (where Microsoft is your telephony provider), then I suggest you read my blog post on Tenant Dialplans in Skype for Business Online. It will tell you why UCDialplans.com is still useful when your entire telephony infrastructure is managed by Microsoft. Even though it was written for SfBO, it still applies to Teams.

What can UCDialplans.com do for me?

In a Direct Routing environment, UCDialplans.com will automatically create the following:
  • Dialplans with normalization rules appropriate for your country, so users can dial phone numbers as they are accustomed.
  • Voice routing policies so you can selectively control who can dial locally, nationally and internationally.
  • Voice routes, which determine where calls are routed
  • PSTN usages, which are the glue between voice routing policies and voice routes
In a Microsoft Phone System environment, UCDialplans.com will automatically create the following:
  • Dialplans with normalization rules appropriate for your country, so users can dial phone numbers as they are accustomed.

What won't UCDialplans.com do for me?

If you're using Direct Routing, the "only" thing UCDialplans.com can't do is setup your SBC infrastructure and configure the link between Teams and your SBC. That has to be done prior to applying a UCDialplans.com script to your environment. Its not a small task, and could take you a while. Don't worry, I'll be here when you're ready. 

To get familiar with what's required, read the excellent documentation on Microsoft's site starting with the Overview, then Plan Direct Routing, followed by Configure Direct Routing, but stop when you get to the section listed Configure Voice Routing. This is the point where UCDialplans.com takes over.

Getting Started

For those using Direct Routing, I'm assuming you've already setup your SBC infrastructure and have paired your SBCs to your Office 365 tenant. UCDialplans.com PowerShell scripts will check for the existence of at least one SBC via Get-CsOnlinePSTNGateway. If one isn't found, then the script will stop after creating a dialplan.

Generate your customized dialplan script

Go to UCDialplans.com and sign in with a Microsoft account. Once validated, you will see the webform for creating your dialplan become visible.

  1. Select Microsoft Teams as your gateway type
  2. Select the country and city/region where your SBCs are located.
  3. Some countries require special prefixes/suffixes for certain phone calls. Enter any prefixes in the provided boxes.
  4. If your SBCs are connected to the PSTN via SIP trunk, select SIP Trunk. If you are connected via a legacy T1/E1/analog connection or you are required to send numbers formatted to the local number standards, select T1/E1/ISDN/Analog. NOTE: There is a bug in the Microsoft PS commands used to create outbound translation rules that limits rule length to 50 characters (every other PS command allows 1024 characters). This may have an adverse effect. 
  5. If you are connecting to a legacy PBX that requires adding a prefix to external numbers, enter one here. 
  6. Add up to 50 internal extension ranges. If it works for your deployment, add every extension range used across your deployment here. You will see why at the Assign internal dialing rules to the local or Global dialplan? question during script execution (see a few sections lower down for details).
  7. If you don't like the auto-generated rulename example shown, you can change it here. Note that you can only control what's in the middle of the rulename. The country name and ruletype are fixed.
  8. If you don't want to control who can make local/national/international calls, you can select Simple Ruleset. 
  9. If the ruleset is for a country where English isn't the first language, you can force English rulenames. It will also remove any non-English standard characters from city/region names and replace them with the English equivalent. 
  10. Once you're satisfied with the configuration, press GENERATE RULES
UCDialplans will start whipping its army of trained monkeys and in no time flat, you will have a customized PowerShell script ready for download.
Notice the Donate button? Not many people see this. :)

Click the DOWNLOAD RULESET HERE button, and save the script as a .PS1 somewhere on your system. You will probably have to unblock it to make it usable without prompting. Right-click the file and select Properties. Click Unblock, and then OK.


Backup your existing Teams EV config

If you've already got a functional Teams EV environment, I strongly suggest you backup your EV details, by downloading and running my suite of Teams Backup/Restore scripts. For more details, see this post, or go to Github to download the latest version directly.

Run the script via PowerShell

Open a PowerShell window, navigate to where the script is located and run the script. You might be blocked from running the script due to PowerShell policies. If this is the case, then run the following command from an elevated PowerShell prompt:
Set-ExecutionPolicy RemoteSigned
Or you can open your kimono and use Unrestricted in place of RemoteSigned.

Run the script from a PowerShell prompt. If you are not already signed into your Office365 tenant, you will be prompted for credentials. If your admin account is not in the same domain as your tenant (ie. uses an @tenantname.onmicrosoft.com address), then use the -OverrideAdminDomain switch.

You can also use the -PSTNGateway switch to enter the FQDNs of the SBCs you want to use. If using more than one, put them in quotes and separate by commas, like this .\US-Chicago-MSTeams.ps1 -PSTNGateway "GW1.contoso.com, GW2.contoso.com". If you're using Microsoft "Super Trunks", you'll need to use the -PSTNGateway switch because the script won't detect any PSTN gateways installed in your tenant.

When the script starts, you'll be presented with several questions:

Create global or user-level dialplan?

You can either assign the dialplan (which controls how users can dial phone numbers) to everyone by default via the Global dialplan or a user-level dialplan (the default selection). If the majority of your users are in the same location, you can use the Global dialplan, which requires one less step when enabling new users for voice. If you will be creating multiple dialplans, then its probably best to select User. The script will create normalization rules as desired.

Assign internal dialing rules to the local or Global dialplan?

If you entered extension ranges via the UCDialplans UI, you will be prompted with this question. If you say Global, the extension ranges you entered will be added to the Global tenant dialplan. This means that any new dialplans created in the future will add those normalization rules to the top. This takes advantage of an undocumented feature described in this post. If you don't want to take advantage of this, select Local.

Assign PSTN usages to Global Voice Policy?

A voice policy defines exactly what numbers a user can dial. You can use voice policies to allow only certain users to dial internationally, or set common-area phones to only dial local numbers (as examples). If you have a simple deployment where the majority of users will be assigned the same voice policy, you can set this globally by selecting either Local, National, or International. Local means that users will only be able to dial local numbers. National means they can dial any number within the country, and International has no restrictions.  If you do not assign anything at the global level, you will have to manually assign voice policies to all users.

Select primary/secondary PSTN gateway to apply routes

If there is a single PSTN gateway defined, the script will automatically use this for all defined routes. If there is more than one, the script will prompt you for which will be the primary gateway and which will be the secondary (if desired). This question will not be asked if you used the -PSTNGateway switch.

Configure voice policies for least-cost/failover routing

If the script detects the presence of existing voice policies created with UCDialplans, it will ask if you want to leverage least-cost/failover routing for these voice policies. If you say Yes, the script will assign the existing voice policies in a way that will route calls using the cheapest path possible, as well as ensure that calls can still work if the main PSTN gateways are down. See this post for more info (was written for Lync, but still applies to MS Teams)

Final Steps

Once done, you should have a fully functional voice infrastructure in MS Teams. If you didn't use the Global options for the dialplan and/or voice policy, you'll have to assign policies to your users. A simple example is as follows (assumes you're assigning to all EV-enabled users):
Get-CsOnlineUser | Where {$_.TenantDialplan -eq $NULL  -and $_.EnterpriseVoiceEnabled -eq $TRUE} | Grant-CsTenantDialPlan -PolicyName BR-SaoPaulo
Get-CsOnlineUser | Where {$_.VoiceRoutingPolicy -eq $NULL  -and $_.EnterpriseVoiceEnabled -eq $TRUE} | Grant-CsOnlineVoiceRoutingPolicy -PolicyName BR-SaoPaulo-National
It will take some time for these to take effect, and will probably require users to restart Teams at some point.

Oooops! I screwed up!

If you accidentally screw up applying a UCDialplans.com script and want to revert to a "clean" setup, you can run the following commands, which will wipe out all custom dialplans, voice policies etc. Don't run this if you've already got a working system.
Get-CsTenantDialPlan | Remove-CsTenantDialPlan
Get-CsOnlineVoiceRoute | Remove-CsOnlineVoiceRoute
Get-CsOnlineVoiceRoutingPolicy | Remove-CsOnlineVoiceRoutingPolicy
Set-CsOnlinePstnUsage Global -Usage $NULL
$GWList = Get-CsOnlinePSTNGateway
ForEach ($GW in $GWList) { Set-CsOnlinePSTNGateway -Identity $GW.FQDN -OutboundTeamsNumberTranslationRules $NULL -OutboundPSTNNumberTranslationRules $NULL -InboundTeamsNumberTranslationRules $NULL -InboundPSTNNumberTranslationRules $NULL }
Get-CsTeamsTranslationRule | Remove-CsTeamsTranslationRule 

Additional Tips and Tricks

UCDialplans.com scripts can be used for some interesting use-cases. For example, assume you're a company that has a single SIP trunk infrastructure that is homed in a single country. For this example, we'll assume its in Canada. Now also assume that you have some users in other countries such as the UK, that have Canadian numbers assigned to them. Those UK users would normally be forced to dial phone numbers as if they were in Canada, which is not something they would be used to.

In this case, you can generate a UK-based script from UCDialplans.com and run it against your deployment using the -DPOnly switch. This will force the script to only create a dialplan for the UK and it won't create extraneous routes/policies etc. You then assign the resulting UK-based dialplan to your UK users and they can dial numbers as they are accustomed to in the UK.


Sunday, February 9, 2020

Migrating SfB Enterprise Voice Configs to MS Teams

I'm flyyyyyyiiiing through the cloud.....get it? Cloud? Teams is in the cloud. Got it? Good.

The UCDialplans.com Winter of Code continues at a torrid pace!

Hot on the heels of the MS Teams EV Backup/Restore scripts is another script that I can't believe someone hasn't already cooked up.

Say that you have a well-oiled Skype for Business Enterprise Voice deployment that you carefully cultivated over the years into a perfectly tuned beast. You're considering migrating to Teams, but aren't terribly enthusiastic about having to recreate all that magic in Teams.

Well, worry no more! I've created a script that will copy all of your Skype for Business Enterprise Voice settings into MS Teams. It will handle the following:
  • SfB dialplans into Teams dialplans (along with all normalization rules, of course)
  • SfB PSTN usages into Teams PSTN usages
  • SfB voice routes into Teams voice routes
  • SfB voice policies into Teams voice routing policies
  • SfB trunk translation rules into Teams translation rules
  • SfB PSTN gateways into Teams PSTN gateways
Most of this is completely automatic, except for the PSTN gateway part. Teams PSTN gateways have to be publicly accessible via FQDN, and that FQDN's domain name has to be registered in the O365 tenant. Chances are pretty good that the SfB PSTN gateways won't conform to those requirements. The script will first look for an existing Teams gateway that matches each SfB gateway. If one isn't found, the user will be prompted to do one of the following:
  • match the SfB gateway to an existing Teams gateway with a different FQDN
  • create a new Teams gateway with the same FQDN as the SfB gateway (only works if the SfB gateway already meets the Teams FQDN requirements)
  • create an entirely new Teams gateway
  • don't match the SfB gateway
All this is presented to the user in a straightforward menu. Once all the selections are complete, the selected matches are shown before erasing any existing Teams EV configs and migrating the SfB EV configuration:

The usual trained monkeys will then migrate all the SfB EV settings to Teams, with a few caveats:
  • Since Teams doesn't have "sites", site-level SfB dialplans will be converted to user-level dialplans
  • Same deal with site-level voice policies
  • If there are duplicate translation rules, they will be merged into one, but translation rules with the same name, but different patterns/translations will be changed to include the PSTN gateway name to avoid conflicts.
If all goes well, the script should progress like this:

If you want to see more details around how the secret sauce is made, run the script with the -Verbose switch:


Once complete, your SfB Enterprise Voice config should be completely migrated to Teams. Check things over to be sure. If you elected to create Teams PSTN gateways, you will have to revisit them using Set-CsOnlinePSTNGateway to make sure they're configured correctly. 

Hopefully, this script will help make your transition to Teams that much simpler!

To get the script, go on over to my Github page to get the latest version. If you experience any issues, you can create an bug report through there.

https://github.com/kenlasko/SfBEV2TeamsEV


Tuesday, February 4, 2020

Backing up and restoring Teams Enterprise Voice configs

In the cloud....get it?

Whenever I made changes to a Skype for Business Enterprise Voice configuration, either via a UCDialplans.com script or manually, I got into the habit of making a backup of the Enterprise Voice configuration. Skype for Business made this easy with an option directly in the UI that allowed you to backup and, more importantly, restore. I've made use of both options on more occasions than I can think of.

In the MS Teams world, there are a few scripts out there that help you backup your Teams Enterprise Voice configuration as part of a larger backup of the entire environment. However, I haven't found one that will let you restore that backup. Now there is!

I've published two PowerShell scripts that allow you to backup and then restore an MS Teams Enterprise Voice configuration in a few minutes. Slide on over to my Github page for the latest version.

https://github.com/kenlasko/BackupRestoreTeamsEV


BackupRestoreTeamsEV

PowerShell scripts that allow you to easily backup and restore your Microsoft Teams Enterprise Voice configuration

Getting Started

Download the scripts onto your local Windows machine where you normally connect to your MS Teams tenant.

Prerequisites

Requires that you have the Office 365 PowerShell module installed, and that you have a Microsoft Teams Enterprise Voice configuration that you are interested in backing up/restoring. You may have to set your execution policy to unrestricted to run this script:
Set-ExecutionPolicy Unrestricted

Running a backup

Simply run .\Backup-TeamsEV.ps1 from a PowerShell prompt. If you are not already connected to your Teams tenant, the script will prompt for authentication. If your admin account is not a @tenantname.onmicrosoft.com account, then you should use the -OverrideAdminDomain switch.

Restoring a backup

Run .\Restore-TeamsEV.ps1 with the path to the backup file to restore. If you are not already connected to your Teams tenant, the script will prompt for authentication. If your admin account is not a @tenantname.onmicrosoft.com account, then you should use the -OverrideAdminDomain switch.
By default, the script will clean out any existing config, including dialplans, voice routes, voice routing policies, PSTN usages and translation rules. You can override this behaviour by using the -KeepExisting switch.

Monday, February 3, 2020

Undocumented behaviour with dialplans on MS Teams

Who am I talking to? Eartha Kitt? Sorry, wrong number. I was trying to call my car.
I've been spending a lot of time recently messing around with MS Teams dialplans thanks to the recent release of SBC-specific translation rules. For the most part, the overall structure is the same as with Skype for Business on-prem. Some PowerShell commands are different, but most of what you already know is usable in Teams.

The biggest issue with Teams is that there hasn't been a UI for managing your Teams Enterprise Voice layout. This can be an issue if you are big into Direct Routing.  Thankfully, Microsoft recently made available what is hopefully the first round of UI enhancements to the Teams Admin Center. You can now create and manage dialplans in the UI. Microsoft has dutifully updated their documentation to help people navigate these new features.

However, there are some undocumented features that open up some interesting scenarios. Along with these are some extremely frustrating bugs that you should be aware of.

The Hidden Feature

In Skype for Business on-prem, there is a global dialplan that applies to users when there isn't an appropriate site or user-level dialplan. In the Teams documentation, the tenant Global dialplan serves a similar purpose, but there are additional features outside of what can be done on-prem. 

In Teams, Microsoft has published a series of very simple pre-defined dialplans called service country dialplans that apply to nearly every country in the world. You can see these by running Get-CsDialPlan and Get-CsVoiceNormalizationRule. They do the bare minimum, and don't do any real validation. These dialplans cannot be modified. 

The documentation goes on to say that you can define normalization rules in the tenant global dialplan or any number of tenant user dialplans. If a user tenant dialplan isn't assigned to a user, they will be assigned an effective dialplan of whatever is in the tenant global dialplan and the default service country dialplan for that user. Similarly, if a user is assigned to a tenant user dialplan, their effective dialplan will consist of the contents of the assigned tenant user dialplan along with the user's service country dialplan. The tenant dialplans have higher priority than the service country ones. 

The hidden feature is that if you have defined any normalization rules in the tenant global dialplan, those normalization rules will appear at the top of the list of any new tenant user dialplans created afterwards. This can be very useful in large organizations with many sites, but have a common set of extension dial rules. You simply have to define the rules once in the tenant global dialplan, and they will show up in every new tenant user dialplan created from that point forward. This applies to dialplans created in both PowerShell and the Teams Admin Center.

Unfortunately, there isn't a real link between the tenant global and tenant user dialplans. They are simply copies of the original. If you make a change to the tenant global dialplan, it won't be reflected in all your other dialplans. As with Skype for Business, you're still stuck with using PowerShell to manage bulk changes. Overall, it might make deploying new dialplans just a little bit simpler if you choose to take advantage of this undocumented feature.

The Bugs

Unfortunately, there are also a number of annoying bugs/oversights with the new UI. Some are cosmetic, but some will force you to re-create your dialplan if you accidentally encounter one.

Description Discrepancies

If you've used UCDialplans.com to create your dialplans, you may have noticed that I make extensive use of the Description field to let people know where the rules came along with a copyright notice. I even put in linebreaks to make it readable in the SfB Control Panel UI. These descriptions are rather lengthy and go well beyond 255 characters (sorry, not sorry).

Here are my grievances with the Description field in the MAIN dialplan UI:
  1. The Teams admin center dialplan UI doesn't respect the linebreaks and just renders a wall of text.
  2. The UI throws an error that you can only have up to 255 characters, when PowerShell allows a much higher number.
  3. The UI also throws errors about "invalid characters", such as !@#$%^*()=/\[]{}:;?<>+' Again, PowerShell has no issue with any of these characters.


What makes this even more odd, is that the UI for the individual normalization rules exhibits NONE of these issues. It renders the linebreaks properly, and doesn't complain when the description is longer than 255 characters and includes "special" characters.

The External Dialing Prefix Bug

This is a big bug, and am quite surprised it made it through QA. For a bit of background, you can configure Teams so that users can dial an external access prefix (like 9), before dialing an external number. For users coming from a legacy PBX, this is undoubtedly a boon and doesn't force them to retrain years of muscle memory. It also makes off-hook dialing more reliable. For an extended explanation of this feature, go waaay back to one of my posts from 2011 on the topic. I haven't tested it myself, but the details should still apply to Teams.

Most customers don't bother with this feature, and have been happily creating dialplans in Teams/Skype for Business Online for years via PowerShell without defining an external dialing prefix. However, if you create a new dialplan or edit an existing one in the UI, you will not be able to save your changes unless you set an external dialing prefix.

Also, this seems to have found itself into the PowerShell commands themselves, but not completely. You can create a new dialplan with New-CsTenantDialplan without an external dialing prefix, and you can make changes to an existing dialplan with Set-CsTenantDialplan, but if you try to remove an external dialing prefix via PowerShell by setting it to either $NULL or "", you will be denied.

As long as you don't set a prefix, you should be fine. Don't do what I did and set a prefix in the UI to see what happens, and expect to be able to remove it in PowerShell. This forced me to redo my entire dialplan from scratch. Thankfully, UCDialplans.com took care of that in a minute.

Spelling Mistakes

A minor quibble, but one that will force me to keep a close eye on (boo hoo me). The New/Get/Set-CsOnlinePSTNGateway command has options for setting inbound and outbound translation rules:

  • InboundPstnNumberTranslationRules
  • InboundTeamsNumberTranslationRules
  • OutboundPstnNumberTranslationRules
  • OutbundTeamsNumberTranslationRules

Do you see the problem?

Someone's spellcheck didn't work.

Conclusion


I'm trying to get this in front of the right people at Microsoft to get them to fix. Hopefully, this half of my post will have a limited shelf life. Have any of you experienced any of these issues or come across any others? Let me know in the comments.

Wednesday, May 22, 2019

Useful Teams PowerShell Commands

Back in the day, I compiled a shortish list of Lync/Skype for Business PowerShell commands that did some reasonably useful stuff. With my shift to Teams, I figure now is a good time to start compiling a list of semi-useful PowerShell scripts for Teams. I will add to this list as I think of them.

Getting Started

For now, there are TWO PowerShell modules for Teams-related tasks. Both require at least PowerShell version 5.x (run $PSVersionTable.PSVersion to check):

Skype for Business Online PS Module

The OG. You install it via https://www.microsoft.com/en-us/download/details.aspx?id=39366. You typically connect to your tenant via some variation of the below:
$s = New-CsOnlineSession -Credential (Get-Credential)
Import-PSSession $s -AllowClobber

Teams PowerShell module

To install, simply run the following in an elevated PowerShell prompt:
Install-Module -Name MicrosoftTeams -Repository PSGallery      

You then connect to your Teams tenant by running:
Connect-MicrosoftTeams

You will be prompted for admin credentials. Enter those, and you'll be all set!

Count All Teams Users in your Tenant (Teams PS)

There isn't a direct way to count every Teams user across your tenant. However, you can get a list of users in a specific team. Thanks to PowerShell pipelining, you can string multiple commands together to get the desired result.
(Get-Team | Get-TeamUser | Sort-Object User -Unique).Count
If you want to exclude external accounts who you've granted guest access to Teams, modify the command accordingly:
(Get-Team | Get-TeamUser | Where {$_.User -notlike "*#EXT#*"} | Sort-Object User -Unique).Count
You can get a count of all Skype for Business (on-prem) and Teams users, excluding duplicates by running this from a Skype for Business PS prompt:

$SfBUsers = (Get-CsUser).SipAddress -Replace "sip:", "" 
Connect-MicrosoftTeams 
$TeamsUsers = (Get-Team | Get-TeamUser | Where {$_.User -notlike "*#EXT#*"} | Sort-Object User -Unique).User 
$CombinedUsers = $SfBUsers + $TeamsUsers | Sort-Object -Unique
$CombinedUsers.Count

List All Cloud Auto-Attendants and Associated Numbers (Skype PS)

Can't get a list of just the AA phone number from Get-CsAutoAttendant. You have to parse the resource account list for this.
$AAList = Get-CsAutoAttendant
New-Item -Path AAPhoneNum.csv -Value "Name,PhoneNumber`r`n" -Force | Out-Null
ForEach ($AA in $AAList) {
ForEach ($AppInstance in $AA.ApplicationInstances) {
$AAName = $AA.Name
$AppPhoneNum = (Get-CsOnlineApplicationInstance -Identity $AppInstance).PhoneNumber
Write-Host "$AAName  $AppPhoneNum"
Add-Content -Path AAPhoneNum.csv -Value "$AAName,$AppPhoneNum"
}
}

Wednesday, February 20, 2019

The Current State of Microsoft Cloud-Based Call Analytics

Microsoft Teams continues to evolve at a rapid pace, and nearly every company who currently runs on-prem Microsoft Skype for Business deployments are investigating the feasibility of moving their UC infrastructure to the cloud.

While moving UC workloads to the cloud eliminates the need for most (if not all) customer-owned server hardware, UC media still must traverse the customer network. Since the network is one of the major causes of poor call quality, customers still require advanced troubleshooting capabilities.
Microsoft does provide some basic call analytics in Office 365, but there is much room for improvement. As such, many 3rd party vendors (including Nectar, the company I work for) are keen to fill the gaps. Unfortunately, there is a lot of confusion and misdirection in the marketplace about what is possible with 3rd party call analytics in Office 365 UC platforms.

Skype for Business Online

Even though Skype for Business Online is being deprecated in favour of Microsoft Teams, there are still many customers who have not made the transition. As mentioned previously, Microsoft does provide some limited call analytics and reporting capabilities for both SfBO and Teams at no extra cost, but the available tools only show a subset of the available information, presented in limited ways. A dedicated person can customize the tools to meet some of their needs, but this takes time, effort and deep knowledge.

This is the ideal place for other companies to provide additional value. Unfortunately, the only way to access detailed call analytics is to use the Get-CsUserSession PowerShell command (included as part of the Skype forBusiness Online PS Module).

The output of the Get-CsUserSession command provides detailed CDR and quality information for a specified user over a specified timeframe in JSON format. Much of the detail is not available in the existing O365 dashboards. At first blush, this appears to be a fantastic way to import detailed call data into 3rd party call analytics platforms, but there are some significant limitations:
  • The Get-CsUserSession command only returns data for a single user
  • No built-in delta mechanism, so no way to return only new/updated information since the last time the command was run
  • Data is only available for 30 days

Theoretically, a tool could constantly run the Get-CsUserSession command for every user in the enterprise, but this is not an approach that scales to the enterprise-level.  Nectar looked at this but discarded it after early tests showed inherent scalability issues.

Another approach would be to provide a GUI front-end that simply runs the Get-CsUserSession in the background on demand for a specified user. This avoids any scalability issues and can provide some useful information on a given user’s call quality. However, this approach doesn’t allow for any enterprise-level reporting or trending data, since data for all users is never downloaded.

Microsoft Teams

As mentioned in the previous section, customers have access to a limited portfolio of Teams call analytics tools through their Office 365 subscription. There is room for improvement and vendors are anxious to show value in this area.

At the time of writing, there is absolutely no way to access detailed call analytics about Microsoft Teams calls or conferences. The Get-CsUserSession command discussed in the previous section only returns call data for SfBO calls.  Some Teams PSTN calls may show up in Get-CsUserSession results, but that’s because it appears PSTN calls are routed through SfBO infrastructure. Detailed call data on P2P calls or conferences are not available.

Some vendors provide some great analytics about Teams usage (channel members, activity etc). These analytics are provided through the Office365 Graph API and does not provide any detailed call analytics. Through misunderstanding or miscommunication, some customers end up confusing this point and think they can get the same level of call quality troubleshooting as they currently can from on-prem Skype for Business deployments.

The Future of Microsoft’s Cloud-Based Analytics

Microsoft has not shared any information about when or if they will release an API that will allow vendors to incorporate Teams call data into their existing call analytics platforms. Rest assured that Nectar is keeping a close eye on the situation and will be able to incorporate Office365 call analytics into our call analytics platform as soon as something is available.

In the meantime, if a vendor is promising they can do advanced analytics for Microsoft’s cloud platform, think of this and ask the right questions:
  • Exactly what kind of call data can the tool retrieve? (MOS scores, jitter, packet loss etc)
  • How does the tool get data from Office365?
  • Does the tool provide detailed call quality reports for the entire enterprise?

If you get appropriate answers, then you can make a more informed decision on purchasing a call analytics platform for your cloud-based UC platforms.

This article was also posted on Nectar's website and Telecom Reseller

Tuesday, September 18, 2018

Skype Optimizer JSON Interface Now Available

For people who like to have more control over how dial rules are implemented but want to leverage my vast database of worldwide dial rules, I have implemented a JSON interface for the Skype Optimizer.

The interface will return all the dial rules for a given country in JSON format, which can then be used in your own scripts or application. 

To access the API, you simply construct the URL to correspond to the correct representation for the desired country. The base URL for the JSON interface starts with:

https://www.ucdialplans.com/queryapi/

You then add specific options as query strings. For NANPA countries like US, Canada and many Caribbean countries, use the following:
Query String
Data Value
Required?
countrycode
1
Yes
npa
3-digit integer
Yes
nxx
3-digit integer
Yes
natscope
national/uscan/all
No (defaults to national)
sevendigit
yes/no;1/0;true/false
No (defaults to no)
apikey
16-character alphanumeric
Yes

For an example location in Chicago, where we want to treat both US and Canada numbers as national numbers, use the following:
https://www.ucdialplans.com/queryapi/?countrycode=1&npa=312&nxx=226&natscope=uscan&apikey=yourapikeyhere

For any other country, the available query strings are as follows:
Query String
Data Value
Required?
countrycode
1-3 digit integer value
Yes
areacode
1-6 digit integer value
Most countries
carriercode
1-3 digit integer valueSome countries
apikey
16-character alphanumeric
Yes

For example, to return the dial rules for London, UK use the following URL:
https://www.ucdialplans.com/queryapi/?countrycode=44&areacode=20&apikey=yourapikeyhere
The results will look something like this, when you parse it through a JSON formatter:

One way to use this data is in your own personal PowerShell script. Below is an example that will pull down the dial rules for 312-226 in Chicago:
$DialPlan = "https://www.ucdialplans.com/queryapi/?countrycode=1&npa=312&nxx=226&apikey=abc1234567890xyz"
$JSON = Invoke-RestMethod -Method Get -Uri $DialPlan
Once you've got the JSON data, you can return specific elements simply by "following the path", as it were:
PS C:\> $JSON.data.routes

local         : {@{pattern=^\+1((872([^01]\d\d))|(847([^01]\d\d))...
tollfree      : @{pattern=^\+18(00|8\d|77|66|55|44|33|22)\d{7}$}premium       : @{pattern=^\+1(900|976)[2-9]\d{6}$}national      : @{pattern=^\+1(?!(24[26]|26[48]|284|345|441|473|649|664|721|[67]58|767|784|8[024]9|86[89]|876|900|976))                [2-9]\d\d[2-9]\d{6}$}international : @{pattern=^\+((1(?!(900|976))[2-9]\d\d[2-9]\d{6})|([2-9]\d{6,14}))}service       : @{pattern=^\+?([2-9]11)$}

You can get as specific as you want:
PS C:\> $JSON.data.normrules.national.pattern^1?([2-9]\d\d[2-9]\d{6})\d*(\D+\d+)?$PS C:\> $JSON.data.routes.international.pattern^\+((1(?!(900|976))[2-9]\d\d[2-9]\d{6})|([2-9]\d{6,14}))
For elements that could have multiple values, such as local routes, you have to write it a little bit differently (note the square brackets):
PS C:\> $JSON.data.routes.local[0].pattern^\+1((872([^01]\d\d))|(847([^01]\d\d))|(815(20[^189]|21[^1378]|22[01348]|23[067]|24[125]|25[02458]|26[^2469]|27[^035]|28[07]|29[0345]|30[^39]|31[03478]|32[^39]|33[^2569]|34[^0]|35[^089]|36[1346]|37[^5689]|38[23568]|40[^026]|41[^149]|42[^089....
You must also include a valid API key. For testing purposes, I've created a demo API key that anybody can use.
abc1234567890xyz
The output will be obfuscated to deter abuse, but is otherwise valid JSON.  Please give it a try, and if you feel there is a place for this in your company or application, please contact me through the usual channels.

The APIs have been documented on SwaggerHub, where you can check them out and even run tests to see what the output looks like.

I have to give thanks to longtime SfB/Teams MVP Jonathan McKinney for pushing me to do this, and to help test it along the way. Beers are inbound!

Wednesday, June 6, 2018

Teams Direct Routing Now Supported in the Skype Optimizer

Since Microsoft made Teams Direct Routing available as a preview, I've been working to modify the Skype Optimizer codebase to support it. Finally, after weeks of coding and testing, I'm pleased to announce that the Skype Optimizer now fully supports Teams Direct Routing.


O365-native PSTN calling is only available for a small number of countries. A lot of companies have held off from migrating to the cloud until there was some way of allowing PSTN calling for users in the other countries that aren't supported in O365. Direct Routing allows customers basically anywhere in the world to move their users to Office 365 while allowing telephony connections to their provider of choice via on-premises PSTN gateways.

Direct Routing in Teams works almost exactly the same as it does in Skype for Business on-premises. The only differences are in how normalization rules are handled (which I talked about in an earlier post), and there is no support for trunk translation rules. This means that if you have to do any manipulation of numbers before sending to another PBX or the PSTN, you will have to do it at the PSTN gateway level.

There are still voice policies, routes and PSTN usages that are combined together to provide nearly limitless ways to control how phone calls are routed in your company. The difference is really just in the name of the PowerShell commands, as shown below.

Skype for Business
Teams Direct Routing
Get-CsVoicePolicy
Get-CsOnlineVoiceRoutingPolicy
Get-CsVoiceRoute
Get-CsOnlineVoiceRoute
Get-CsPstnUsage
Get-CsOnlinePstnUsage

Fortunately, since the underlying concepts are still the same, that means the Skype Optimizer can still provide many of the same features to Teams as with on-prem deployments.  This includes:

  • Class of Service
  • Least-cost/failover routing
  • Extension ranges
Skype Optimizer features not currently supported in Teams include:
  • Location-based routing
  • Selective caller-ID blocking
  • Premium number blocking via Announcement service
  • Call Park
The PowerShell script generated by the Skype Optimizer builds on the same codebase used for Skype for Business Online scripts. The only prerequisite is that you have already paired one or more PSTN gateways to your Office 365 tenant using the New-CsOnlinePSTNGateway command.  If you haven't done this step, the Skype Optimizer script will only create normalization rules that will apply to both Skype for Business Online and Teams. 

Please try out the new functionality and let me know if you experience any issues.

Monday, March 12, 2018

The Evolution of the Skype Optimizer: From Locally-Run VBScript to Azure Web App

I was recently amazed when I realized the seeds of what is now the Skype Optimizer was created 10 YEARS AGO, back when Office Communications Server 2007 R2 was starting to make headway in the unified communications space.

The Beginning

The genesis of the program grew out of a need to know when to strip the +1 from a North American local number and when not to. Rather than rehash the creation myth, you can read all about it from one of my earliest blog posts where I announced the Dialing Rule Optimizer to the world (at that time, the 30-odd subscribers to my blog).

The very first version was a straight VBScript that I had to manually input the proper variables and run it by hand. Rather than give the code away, I told people to email me the phone numbers they wanted to get optimized dial rules for.  I would run the script and send them the results, which was a simple text file with either a bunch of regex, or text formatted to be applied to AudioCodes or Dialogic gateways.  Word got around within Microsoft, and I found myself busy sending stuff to various Microsoft consultants.

When Lync 2010 came around, which was in its earliest days known as Communications Server "14", I added the capability to create simple routing rules that consisted of a few lines of PowerShell code.  I also wrapped the code around a simple UI in something called an HTA (short for HTML application).  It made generating rulesets easier for me, but it was still something that I was running from my local machine.
The earliest known copy of the original Dialing Rule Optimizer. I obtained this from the Smithsonian Museum. The text-only v1.0 has been lost to the sands of time.
I soon figured out that it would be relatively straightforward to move the HTA into an actual web page.  I put the code on a web server hosted by the company I was working for at the time and opened up the tool to the entire world. I actually put this code on the computer that was running our OCS 2007 R2 server!

The very first web-based iteration of the Dialing Rule Optimizer. Note the Communications Server "14" logo on the top-right.

Once Communications Server "14" became Lync 2010, I realized that I could go beyond simple optimized route creation, and modified the Optimizer to create everything required for a simple Enterprise Voice setup for US and Canada deployments.

Shortly after, I realized that I could do the same for other countries as well. The Optimizer interface grew somewhat to accommodate the requirements for different countries.
Dramatic differences abound! Communications Server "14" has changed to "Microsoft Lync". Also, UK dial plans!
I slowly added other countries to the Optimizer. I also added other features such as extension dialing rules, least-cost/failover routing, among many others.

Over time, the back-end code base was starting to become difficult to support. I was using a series of XML files to deal with languages and country-specific dialrules, and the sheer number of them was becoming cumbersome to manage.  I decided to move everything from the company-hosted platform to Amazon Web Services. I built a single Windows VM with SQL Express and ported the XML files to a database. It worked well, but AWS was starting to cost a fair bit to run for a free service. Donations were not keeping pace with costs.

I then discovered that Microsoft MVPs got a monthly allotment of funds in Azure. I immediately moved my infrastructure to Azure, where it ran mostly trouble-free for the next several years.

The Optimizer featureset grew and grew, but the interface was still as ugly as the day I first created it.  One person even suggested it looked like a GeoCities page. Hey, my argument was always that I was not (and am still not) a web developer.


The Modern Era

I decided to try to give the Optimizer a more modern look. I completely re-wrote the front-end code using Notepad++ as my trusty editor.  I replaced the clunky extension builder with a better Javascript framework that emulated an Excel spreadsheet, and made other significant under-the-hood improvements. After much trial and error, I was pleased to unveil the new look.

The website looked modern, clean and easy-to-use.  However, it bugged me that while the site was running in Azure, it was still just a single Windows VM with a local SQL Server instance. It was also costing most of my monthly Azure MVP credits with not a lot of headroom. I decided to try to make the Skype Optimizer simpler and cheaper to manage, figuring that there would probably come a day when I would not be a Microsoft MVP (the horror!!!) and I'd be expected to pay a monthly bill (Oh the humanity!!!).

My first step was to dump the local SQL and move to Azure SQL Database. First, I had to copy the gigabytes of data to my SQL instance.  I opted to use transactional replication, which would allow me to keep both my local and Azure-based SQL instances up-to-date while I tested things out.  It turned out to be ridiculously easy. I had to modernize my code a bit to allow it to still read/write data to Azure SQL, but this was pretty straightforward as well.

With that hurdle out of the way, I looked at a few different ways to further reduce my costs and administrative burden. 

Docker Containers

I'd heard about Docker containers and how it was an easy way to reduce the overall complexity and costs over a traditional virtual machine.  I installed Docker on my home machine and started messing around with it. I used the Image2Docker tool to make a copy of my Windows VM-based website and installed it locally.  I had to do quite a bit of modifications to my dockerfile to support some of the added features that Image2Docker didn't capture, but after a while, I managed to make the Skype Optimizer work in a Docker container. 

Moving my newly-created container to Azure wasn't too much work, but there was definitely a learning curve involved. It started up fine, and I pointed my DNS entries to the container and away we went!  However, all was not perfect:
  1. My container stopped working a few times over the span of a few weeks. Troubleshooting this proved to be nearly impossible due to the nature of Docker containers and how you lose the previous state every time you restart it. Either that or I just don't know how these things really work.
  2. Making code modifications wasn't simple either. I'd have to make the change in my local Docker image and publish that image to Azure. The startup process took 5-10 minutes, which was probably due to how I built my container.  I looked at ways to improve the startup time, but it was already eating up lots of my time.
  3. The costs to run the container wasn't much cheaper than a full VM
Because of those reasons, I decided that Docker containers weren't well-suited to my needs and I finally turned to....

Azure Web App

All the back-end code changes I made to the Optimizer to support both Azure SQL Database and Docker containers actually had an unexpected side benefit: it allowed me to easily move the Optimizer to Azure Web App, which is Azure's web hosting framework.

To make the process of managing this easier, I finally moved away from Notepad++ as a development environment and embraced Visual Studio. Visual Studio made it trivial to take my entire website and migrate it to Azure. I had a few challenges with making my code-signing certificate work, but in the end it all worked flawlessly. 

The Skype Optimizer has been running as an Azure Web App for several months now. Its extremely reliable, simple to manage, and about 3 times cheaper to run than the original Windows VM. 

The Future

So, there you have it. The entire history of the Skype Optimizer posted here for posterity. Where do things go from here? Well, with Microsoft Teams eventually taking over the Enterprise Voice role from Skype for Business, I may decide to look into what it would take to turn the Skype Optimizer into a Teams Direct Routing and Calling Plans management platform. 

Until then, I will continue to keep updating the Skype Optimizer to make sure Skype and Teams administrators worldwide have a single place to get accurate, up-to-date dialing rules for every country in the world.